I recently had the opportunity to take photos for a local restaurant in Ottawa. It was a completely new experience, as I have never taken food photos before (except for quick cell phone shots, of course). I was honest with them about being a newbie, but they still trusted me!
The manager had said that they wanted their food plated, and against a white background; and so, I set up a light box. A light box is great for product photography, especially when you need a seamless background. You can purchase inexpensive light boxes on Amazon, or build your own using a cardboard box, white paper or fabric, and a couple lights or lamps! As for lenses, I brought my trusty 24mm f1.4 prime lens. While is not a typical food photography lens, it was the best I could do without purchasing new equipment. Other great lenses to use: 35mm f1.8 or 50mm f1.4. All of these lenses, with the low aperture capacity, allow for a great variation in depth of field, if you're looking to make your photos have that blurred background look. While I prefer to shoot with my camera in my hands for freedom, I also brought along a tripod to get those shots which required a longer shutter speed.
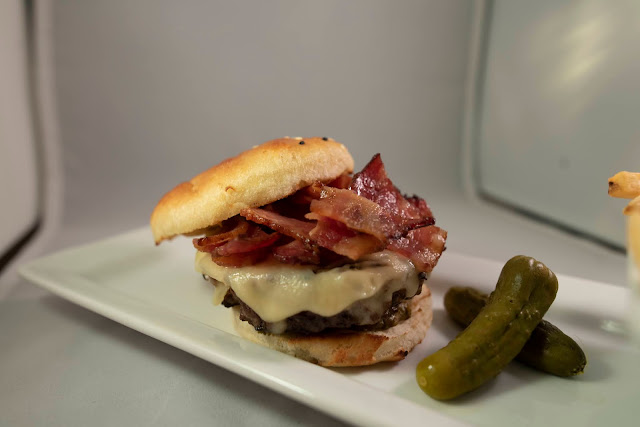
Then it was time. First and foremost, the white balance needed to be set to match the room I was shooting in. It was a fairly dark room, and so I was a little nervous shooting the first food - a tray of nachos - but eventually got the hang of it. A lot of trial and error, 35 dishes, and 1100 photos later, we were done! Then it was time to bring the photos home and edit. Below is the before and after of the restaurant's signature burger:
Before (ISO-400, f/4 1/30s)
As you can tell, the original photo was dull and lacking life, but editing is where the photo really comes to life. Using Photoshop, I started with removing the edges of the light box, did spot corrections, and overall photo clean up, then brought the photo into Camera RAW for colour and light editing. While I had set the white balance when shooting, sometimes it doesn't come out quite as planned, as such in this case. Camera RAW allows you to whiten and brighten your photo, as well as the option to adjust every colour as you like. Once the colour was right, next was tweaking of the contrast, brightness, vibrancy, and sharpness. Once the first photo was set, I copied the settings to all other photos of similar lighting and colour.
I was content with how things turned out (especially since it was my first experience shooting food!), as was the restaurant! They'll be using the photos in their menus.
food photography
food photography for beginners
learning experience
photo tips
photography learning experience
photography tips
pub food
restaurant
restaurant photography


0 comments